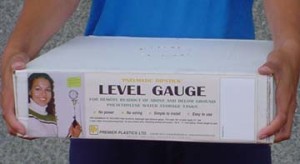
For remote readout of water levels in above and below ground vented storage tanks
Measure the level in your water storage tank – from the comfort of your own garage!
- No power – No wiring
- Simple to install – Easy to use
PRE-ASSEMBLED KIT INCLUDES:
- High sensitivity diaphragm type pressure gauge
- Full scale 100″ of water depth, 2½” dial
- Latex rubber hand pressurizing bulb
- Air flow control valve
- Mounting bracket and screws
- 100′ – 3/8″ vinyl tubing
- Sinker weight for end of dip tube
Download Brochure
How it Works
- The water level in the dip tube is normally at the same level as the water in the tank.
- The pressurizing bulb pushes air into the tube which increases the pressure in the tube.
- As the pressure increases, the water in the dip tube is pushed downward until it is completely expelled from the tube.
- The pressure reached to completely expel the water is the same as the water pressure at the bottom of the tank. (The water pressure at the bottom increases as the depth of water increases.)
- The reading on the gauge shows the pressure in inches of water which is the same as the depth in the tank. Accuracy of the gauge is approximately 2%. Note: 1 p.s.i. = 28 inches of water depth.
- Continued pumping of air into the tube will not change the reading on the gauge after all the water has been expelled.
- The vertical position of the tank has no effect on measurement. Eg. in the ground, on the roof or up a hill.
- Suitable for water depths up to 8 feet.
How to install
- Locate gauge and bulb assembly on wall in garage, utility room or shed.
- Determine buried route and length of vinyl tube between tank and gauge location. Allow 15 feet for length of tube inside tank and on wall. (100 feet of tubing is supplied.) If tank is a greater distance away either;
- Extend length with more tubing (available from most
hardware stores) or,
- Affix the top end of the dip tube to a post adjacent to
the tank. Connect the gauge when a reading is
needed. Remove and plug tube end when not in use.
- Drill a 23 /64 inch hole in the top of the tank. Squeeze the plain end of the tube through hole. Squeeze tube end through hole in sinker weight with approximately 1” protruding from other side. Pull the tube until the end rests freely on the bottom. Extra length of the tube inside the tank will not affect the measurement. Seal tank penetration as necessary.
- Affix instruction label above the gauge.
Note:
- Slope the tubing down towards the tank and bury below the frost line if possible. This will prevent condensation freezing and blocking the tube.
- Be careful not to crimp or crush any of the tubing. Test system before and after backfilling.
How to Operate
- Make sure pressure release screw on bulb is closed.
- Squeeze the pressurizing bulb slowly several times until the gauge needle stops rising.
- Read inches of water from the inside scale.
- Refer to tank manufacturer’s information for water volume at various levels in your specific tank.
- Open pressure release screw.
Suggestion: Mark on the dial cover the full tank position of the needle.
Caution: Do not push the gauge needle beyond the maximum reading as damage and a false reading could result. (This could occur if there is a blockage or kink in the tubing.) Where the gauge is mounted below the tank, make sure the tubing rises 1-2 feet above the maximum water level in the
tank before it turns down to the gauge. (If water rises in the tube to the turndown point, the tank could potentially drain by siphon action.)
Trouble Shooting
- No pressure reading when pumped:
- Disconnection in air line tubing.
- Tank is empty.
- End of tube is above water level.
- Pressure reading higher than maximum expected:
- Blockage, kink or restriction in air line tubing.
WATER TANK LEVEL GAUGE
At last! A simple and fast method to accurately measure water levels in storage tanks – for much less than competing electronic or ultrasonic devices.
Add this to your system where visual inspection or a manual dipstick is inconvenient, awkward or not possible.
There is no limit to the horizontal distance between the storage tank and level gauge, and no limit to the vertical separation. The storage tank can be above or below the gauge location.
Can be used for:
- Rainwater Catchments
- Delivered Water
- Shallow Wells
- Water Table Measurement
- Holding Tanks
The heart of the system is the high sensitivity diaphragm type altitude/pressure gauge that reads directly in inches of water (full scale: 100 inches or 3.6 psi). This type of gauge is not to be mistaken for the more common (and much less expensive) Bourden tube type pressure gauge.
Shipping dimensions of each pre-assembled kit: 16″ x 16″ x 4¼”
Carton of four individual kits: 16½” x 16½” x 16½”
